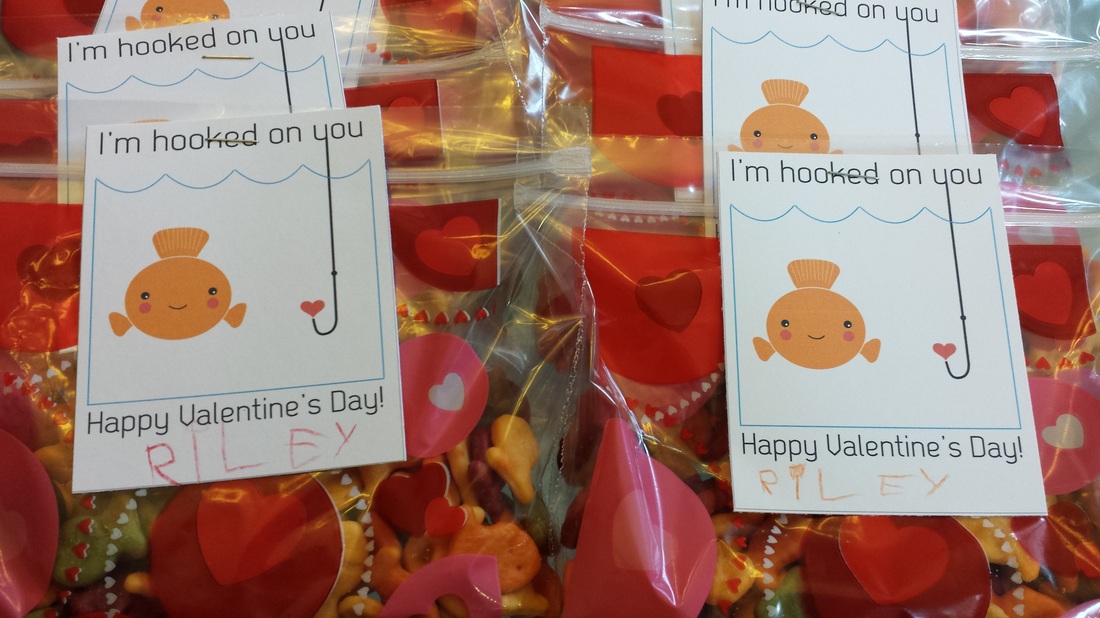
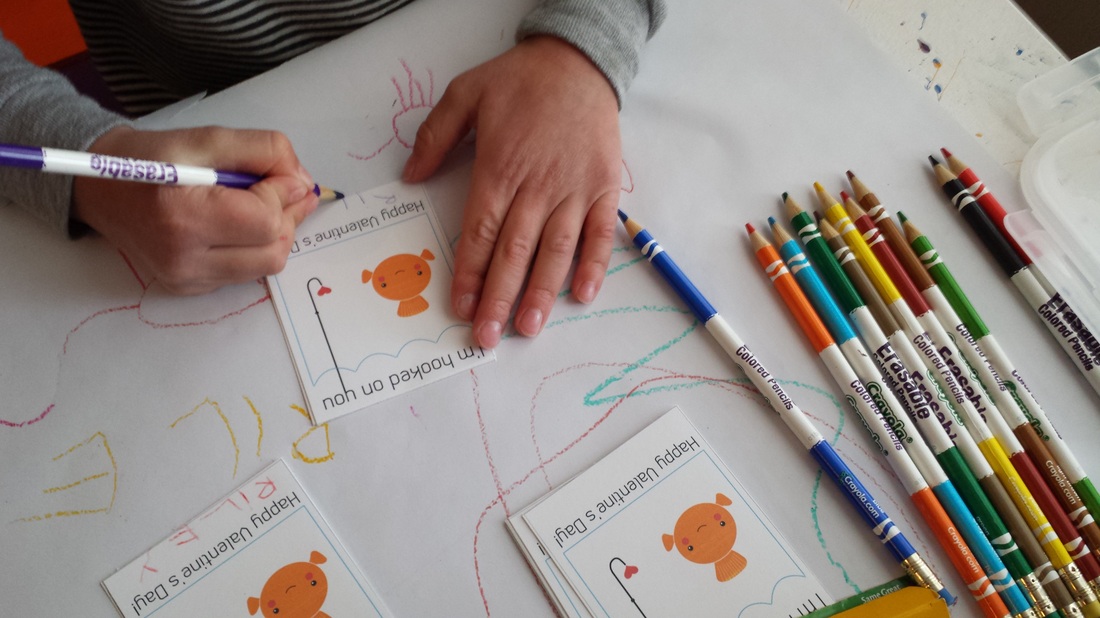
I know it's been quite awhile since I've posted but I suppose that's because we've had a busy year! Most recently, I've started writing blog posts about green parenting for an energy company. It has been a fun way to find new things to do with Riley and ways to promote being green in our own home. My blog post that came out today inspired Riley's Valentines for his schoolmates this year. I found this super cute idea for a candy-free Valentine while researching my latest blog post on New Leaf Energy. It was simple, cute, easy, & fun! Since I couldn't find the individually wrapped pouches of Goldfish, I bought a large box of Goldfish and some Valentine's snack bags. This turned our Valentines Day project into a math work! Riley measured out 1.50 oz of Goldfish for each bag. He learned how to measure out just the right amount, not too little or too much. Next, Riley was able to practice his handwriting by signing his name on each of the Valentines. His classmates may not realize how much effort was put into this simple snack but I'm glad Riley had fun participating in the making of their Valentines!
Read my blog post, Forget the Candy! 6 Fun & Healthy Valentine Alternatives for Your Kids to Share, for more ideas on candy-free Valentine alternatives.
Find me on New Leaf Energy here!See all of my Direct Energy blog posts here!
This week is teacher appreciation week and I wanted to make something fun for Riley's teachers. I was searching my Gift Ideas board on Pinterest when I found this pin: 39 DIY Girfts You'd Actually Want to Receive. I had pinned the photo of the Terrarium Kit and knew that this was what I wanted to do! Of course, I had the so much fun buying supplies and getting everything ready that I finished the terrariums instead of leaving them as a kit for the teachers to put together...something tells me they won't mind too much!
Teacher gift - DIY Terrarium
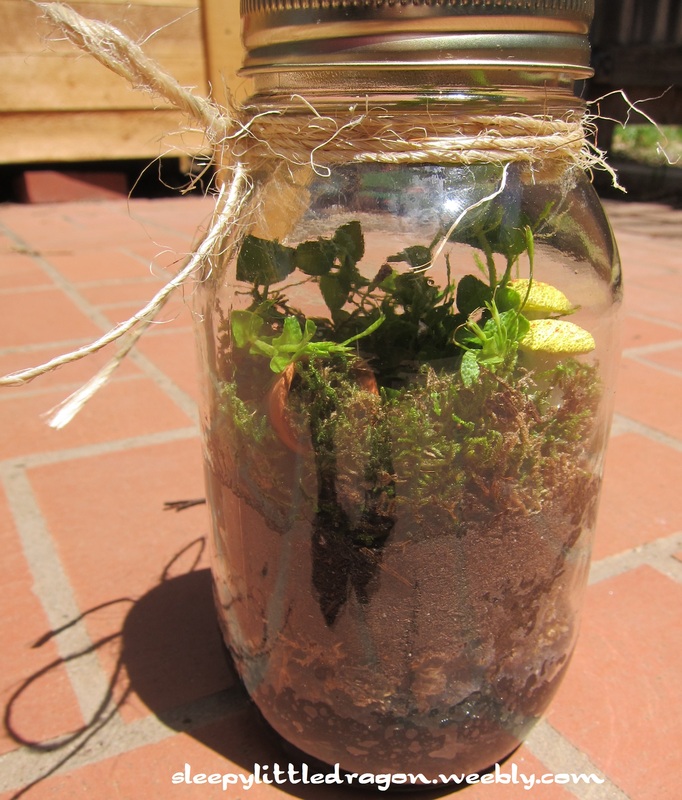
While I was making the teachers a terrarium, I decided that I needed one as well...then my husband asked for one for his office so in the end, Riley & I made 4 terrariums!
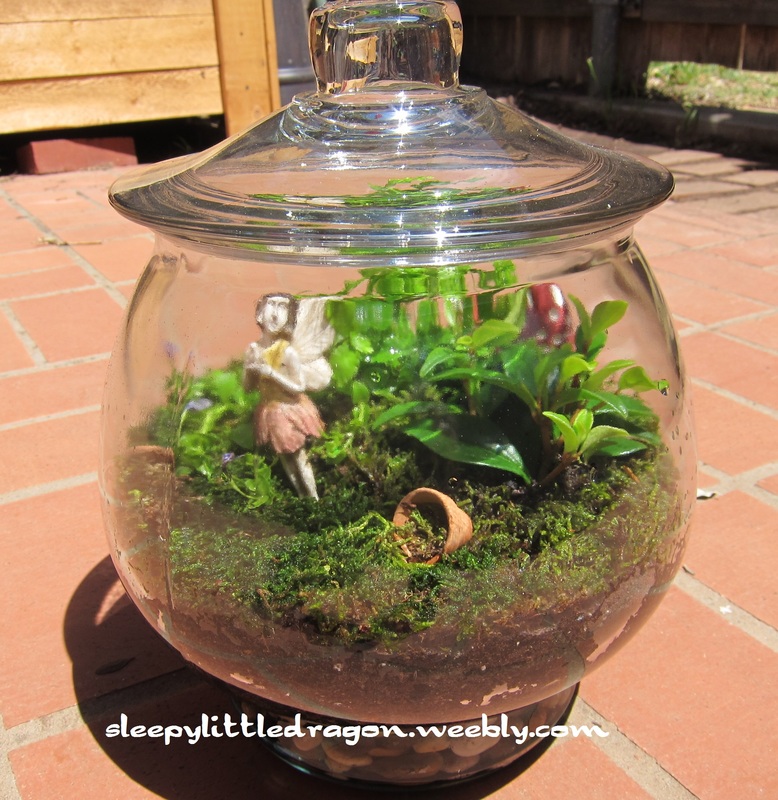
My terrarium, complete with spilled terra cotta pots, mushrooms, & a faerie.
I pulled some Pinspiration from my Plants & Fungi board to see more instructions on what all to include in my terrarium. I ended up combining a few things, mostly because I really liked the layered look of one terrarium in particular (seen here). (Also, there are some great instructions found at this website.) Supplies! - Glass jar
- Gravel, pebbles, marbles
- Activated charcoal (available at pet stores or gardening stores)
- Sphagnum moss (the dead stuff, found at gardening stores)
- Potting soil
- Small plants
- Spoon & butter knife
- Moss (living would be best)
- Small decorations
Make it! - Pour in 1-2 inches of pebbles on the bottom of the jar.
- Place sphagnum moss - this helps prevent the soil from going down into the pebbles.
- Add a thin layer of activated charcoal - this helps to filter the air. *Note - I forgot and did the charcoal before the sphagnum moss...oops!
- Sprinkle a layer of potting soil, roughly ~1/4 - 1/2 inch.
- Remove your plants from their pots and break up the roots a bit to encourage growth. Place in the terrarium in the desired positions - take your time! This is part of the fun in deciding how to set it up.
- Using the knife to help you hold back the plants, spoon more potting soil all around the plants, filling in the gaps. You should have about 1-2" total potting soil.
- Add the moss - you'll need to break it into smaller chunks to fit the spaces around your plants. Gently lift the foliage and place the moss all around the plants' stems. I used the knife to sort of poke it down into place, pushing the edges of the moss down around the inside of the jar.
- Add decorations! My favorite step! I purchased most of my things from my local garden store - they now have fairy garden supplies, making it awfully convenient to pick up cute little decorations! I found the terra cotta pots at Michael's.
- Sprinkle in some water, not too much...it shouldn't be higher than the gravel in the base of the jar.
- Put the lid on and leave it in an area of your home that receives bright light (not too dark, not too sunny!).
It may take awhile to figure out if you have too much water or need to add more. Keep an eye on your terrarium and if it starts to look dry, add more water. If there is too much condensation, remove the lid for a little while to let the water escape. You should be able to reach an equilibrium where you need not remove the lid! You'll have your very own self-contained terrarium! Learn more!

EcoSphere Self-Contained Underwater Ecosystem
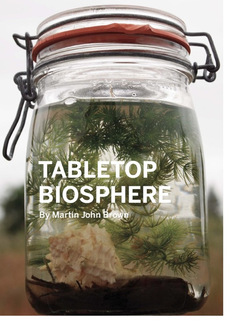
Make your own Biosphere!
- Here's a great list of terrarium books someone else has already put together.
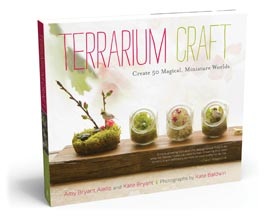
Terrarium Craft: Create 50 Magical, Miniature Worlds By Amy Bryant Aiello and Kate Bryant
- You should also check out the amazing Fairy Gardens on The Magic Onions! They have a competition every year so there are loads of fun photos to ooooh and ahhhhh over!
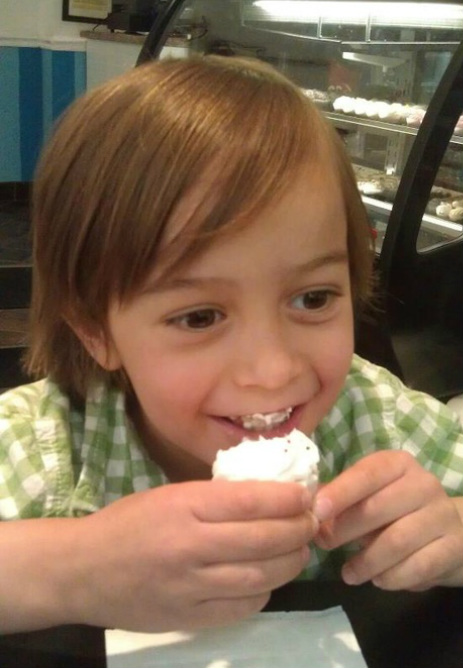 Riley's recent haircut Hello! I have been meaning to post more often but we've just been so busy! I wanted to try out the new Weebly app so here's a quick update from my phone! What do you think of Riley's new haircut? He needed a little encouragement so I promised a treat afterwards. Luckily, there were cupcakes right next door!
While trying to devise a way to hang our holiday cards one year, my husband helped me to craft a magnetic display. Now that Riley is in preschool and bringing home lots of artwork, we made a few more strips to display his creative handiwork.
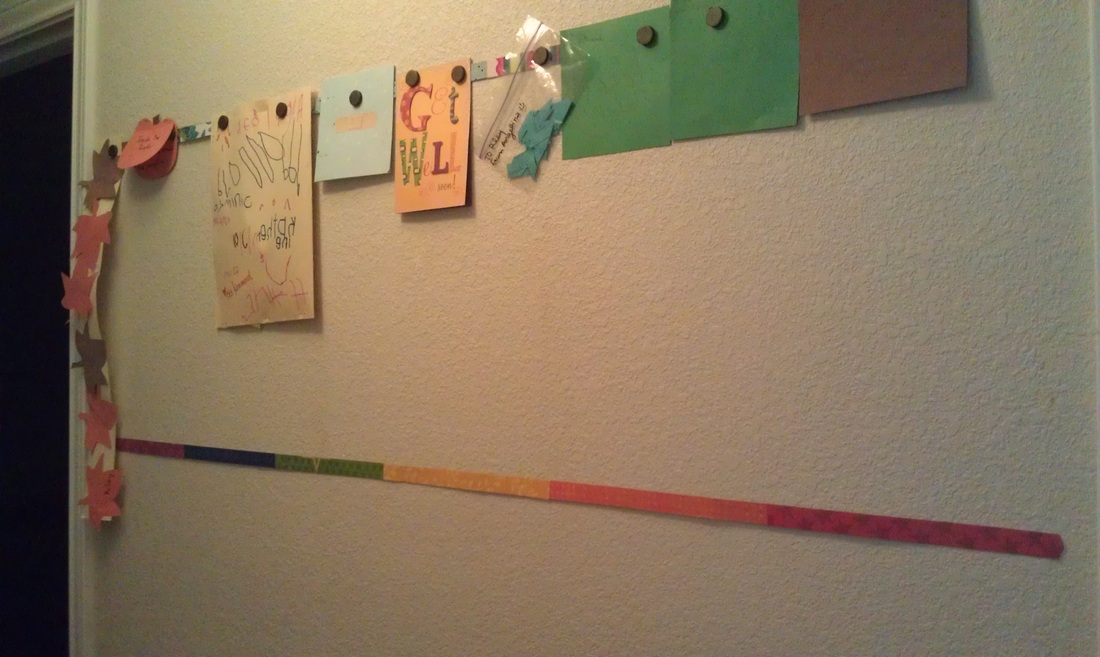
Two of the three magnetic strips we placed in our hallway. I removed the artwork from the second strip so you could see the craft paper.
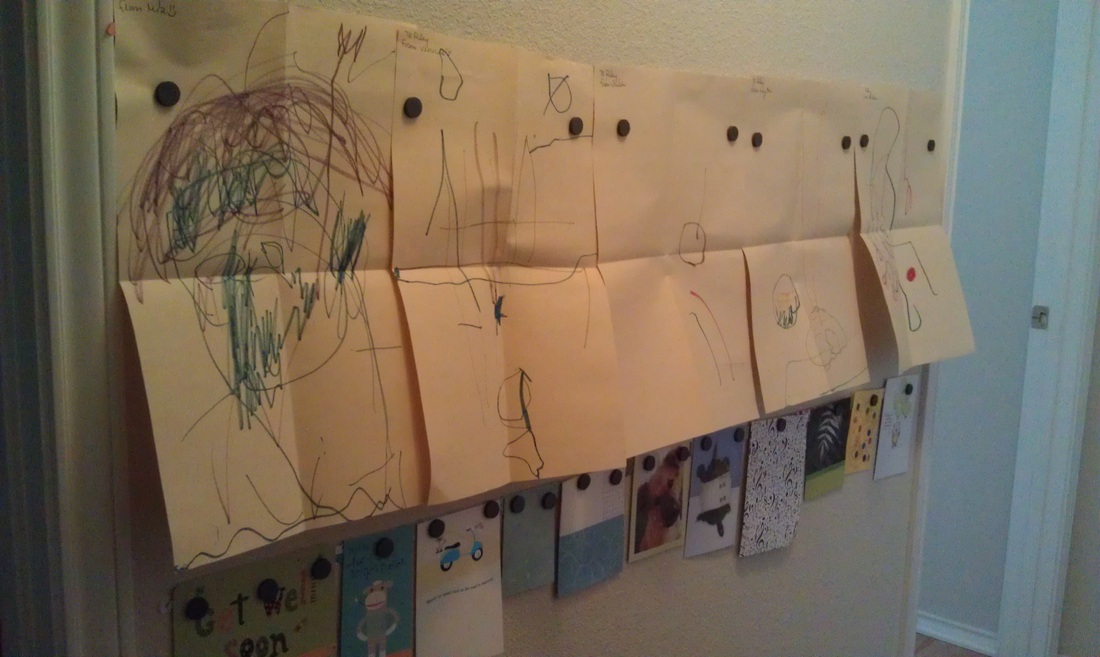
With the lower two magnetic strips at Riley's level, he can easily view his get well cards and artwork from his friends.
Last week, my mom helped me to make the new strips in the photos above. We made 3 for our hallway, 1 for Riley's room, and 1 for her to take home. We decided not to dress up the magnets this time but I may go back later to finish decorating them. These new magnets are from Target as Home Depot was out both times I went looking for them. The Target magnets aren't nearly as strong so some of Riley's heavier and/or thicker work does not stay up, even with multiple magnets. Hold out for the stronger ones - it's worth it!! Supplies  Magenetic strip I used for this project * Galvanized Steel Hanger Strap 3/4" (found at Home Depot or Lowe's in the plumbing section)
* Measuring Tape
* Sharpie
* Metal cutter (we used tin snips)
* Craft Paper
* Paper Trimmer (OR rotary cutter & memory mat OR scissors & ruler)
* Mod Podge
* Paintbrush
* Round magnets 3/4"
* Clear flat marbles 3/4"
* E6000 (or your favorite super strong glue)
* Scissors
* Pencil
* Level
* 3M Command Poster strips
1) After you decide where you want to hang your art display, use your measuring tape & Sharpie to mark the length of the magnetic strip. Use the metal cutter to snip the metal on your mark. I also used the metal cutter to round off the edges so they weren't so sharp.
2) The next step is the most fun - select and trim your paper! It could be a theme, a mix of leftovers, whatever you like! The first strip I made had a winter theme for our holiday cards. The new strips were leftover scraps that sort of went together and then I also made a couple of rainbow strips.
Trim your paper down to 3/4" strips. Double check the first strip to make sure it covers your magnetic strip; you may have to adjust trimming the paper accordingly. Since I was making a few magnetic strips, I just trimmed a bunch of paper at once so I could easily mix & match as needed.
3) Time for the Mod Podge - I think this was my mom's favorite step! Use the paint brush to glue the paper strips to the magnetic strip. When everything is in place, use the mod podge once again to paint a coat over the top of the paper. You could also use a clear sealant but the Mod Podge was already out so I just used that instead.
4) Magnets! Hopefully by now you have decided if you'd like to decorate them or leave them plain. If you leave them plain, move on to step 5 - you're nearly finished!
For the holiday card holder, I decorated the magnets with paper scraps & clear flat marbles. Cut out squares of paper slightly larger than the flat marbles. Use a dab of the E6000 to glue the paper to the marble. Trim off the paper around the marble with scissors or a razor blade and memory mat. Use the E6000 to glue the marble to the magnets.
5) Hanging the strips can be tricky...at least for me it was! It took two of us to measure out the spot with the aid of a level, mark it with a pencil, then attempt to center all three strips one above the other! I recommend using the pencil to mark on the wall where you'd like to place the bottom of the strip. Follow the directions on the 3M Command poster strips to attach your magnetic artwork strip to the wall. I used three of the poster strips - one at each end and one in the middle.
6) Hang up your children's artwork or perhaps your holiday/birthday cards. Stand back and admire your new magnetic artwork display!!
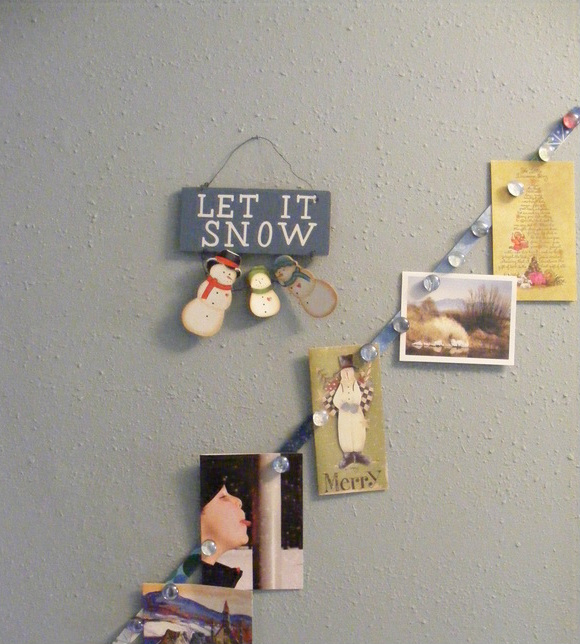
Christmas 2009
You can see in the photo above how I decorated the magnets as well as the magnetic strip for the artwork. I learned the hard way that hot glue is not the best option for really strong magnets - the glass marbles kept separating from the magnets! Which is why I now recommend E6000 - it has a lot more strength to hold things together. ~Be sure to share your photos of your magnetic artwork displays with me on my Facebook page or link to them in the comments below!
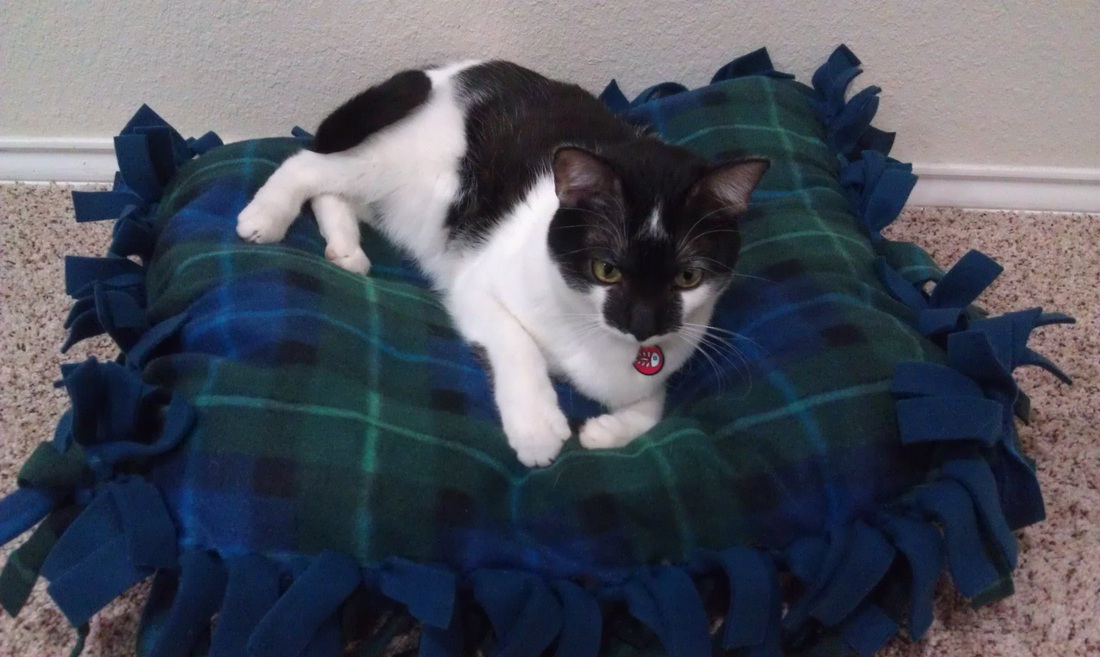
I hope everyone had a Merry Christmas & Happy New Year!! We enjoyed a week long family vacation including visiting friends & family, a trip to the zoo, a bed & breakfast, and attending the Alamo Bowl (Go Beavs!). We have spent this last week recovering from the one thing we didn't want to bring home from our trip...a nasty virus! Althought I didn't get the bug, I was still home all week taking care of the boys. So, I used my down time to make some no-sew fleece pet beds.
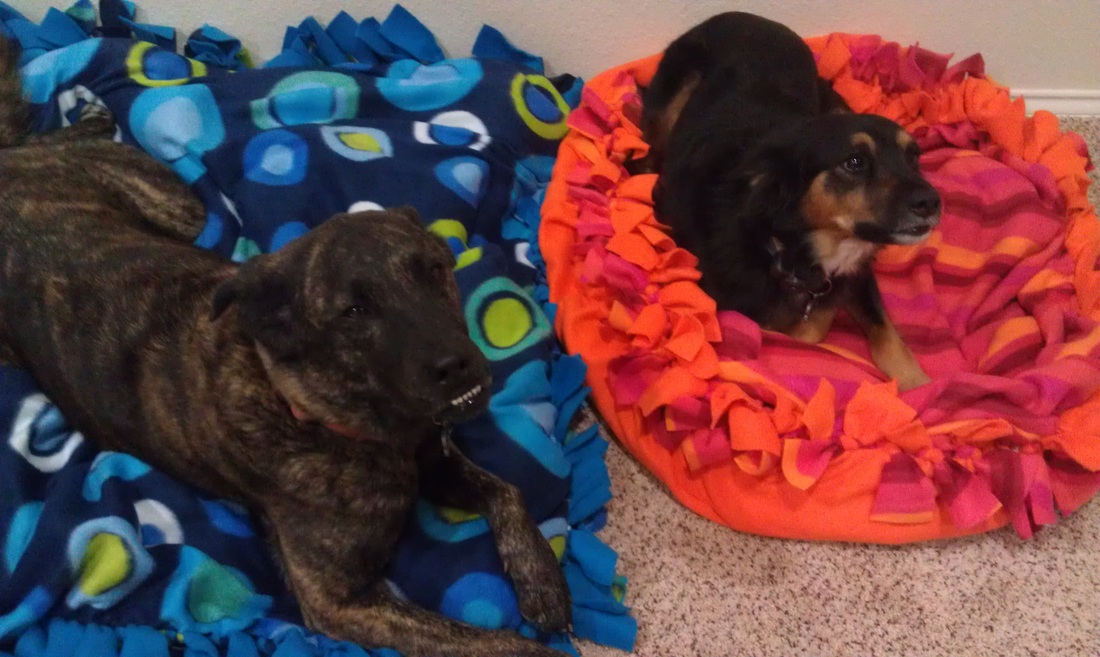
Sasha & Dione, trying out their new beds
I bought the dog bed pattern at Hancock's for $3, fleece on sale for $2-6/yd, and spent $10 on used blankets & pillows from the thrift store for the stuffing. I still have fleece left over to make more beds (I bought a ton...it was on sale and I had a coupon!!!) so I may make a few more beds for donating or gifting.
Onyx on the smallest bed
As you can see, there are three different sizes, and two different shapes. For the first bed I made, I followed the dog bed pattern to make the largest bed with contrasting colors and made the orange circular bed. Following the pattern left me wasting too much fabric and taking too much time to cut the fringe. So after I completed the first bed, I decided to make it simple - a rectangle using the maximum amount of fabric from the 1 3/8 yards of fleece I had already bought for the pattern. Essentially, I made a no-sew blanket then stuffed it to make a pet bed! Easy peasy! Bonus - they are completely machine washable!! My modifications were this: *Line up my two fabric choices & straghten up the edges with a rotary cutter and quilting ruler. *Trim off a 5x5 square on all the corners. *Use THIS amazing tool to quickly & easily cut 5" fringe, 2" apart with a rotary cutter. (I am not kidding - if you want to make any fleece blankets/pillows - go buy this ruler!) I must note that I used pins to hold the blanket together as it made lining up the ties a whole lot easier when I took the whole thing to the couch to work on in front of the TV. *Leave open about 5-10 ties so you can stuff it with a blanket/stuffing. *Finish tying and voilia! A cozy, no-sew, fleece pet bed!
Onyx decided that he needs to sleep in the biggest bed...of course!
~If you decide to make your furries a cozy, no-sew fleece bed, be sure to share your photos with me as I'd love to see how they turn out! ~Also, check out this tutorial on how to use your fleece scraps to make dog chew toys - fleece is great way to help clean their teeth!
Warmest wishes from our family to yours on this Winter Solstice day!!
Cold and dark, this time of year,
the earth lies dormant,
awaiting the return
of the sun, and with it, life.
Far beneath the
frozen surface,
a heartbeat waits,
until the moment is right,
to spring.
Here Comes the Sun
by The Beatles Learn More!
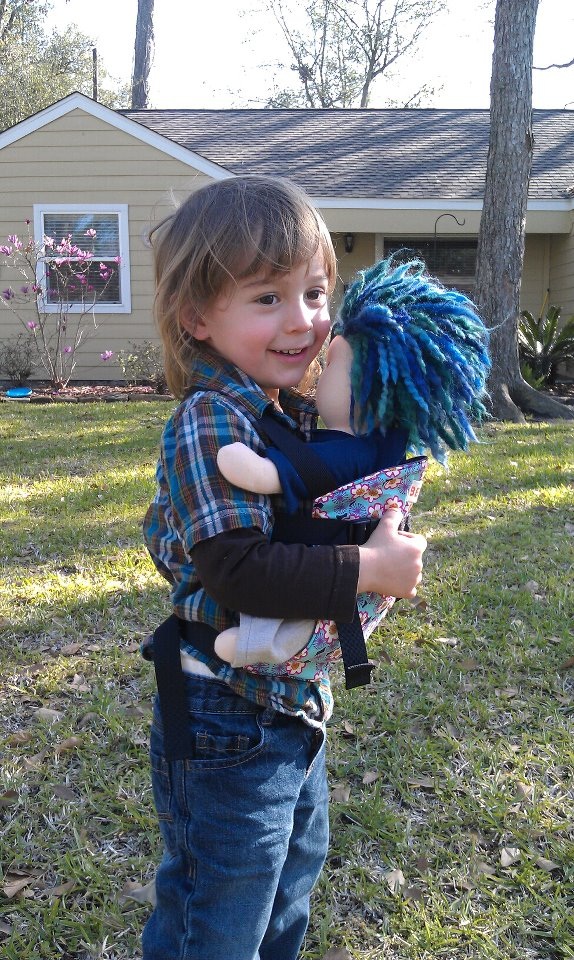
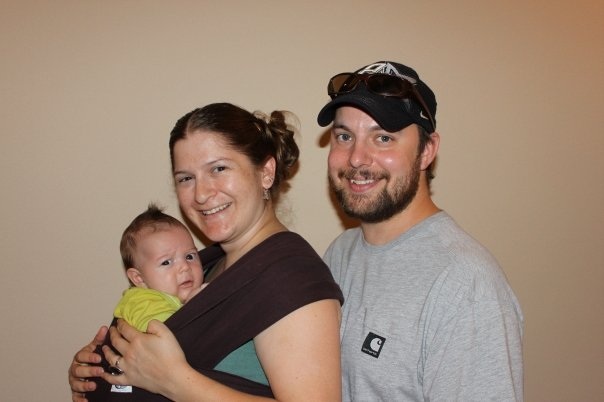
Riley, age 2, using a Beco with Wren in a front carry.
This week, October 8-14 2012, is International Babywearing Week! Check out Babywearing International for ideas to celebrate this week, how to find a group near you, or for more resources on babywearing. Check out their short video introduction to babywearing here. I learned to carry Riley when he was just a few days old! We tried out a pouch sling and a ring sling (click here to learn about the different types of carriers!). Then, as I got a little more comfortable, we started using the Moby wrap on a regular basis. Henry also approved of the Moby and wore Riley quite often. It was our go-to way of getting a sleepy baby to sleep! When Riley was around 5 months old, I decided I wanted a soft structured carrier. I tried out the Beco & Ergo each for one week and decided that the Ergo Baby Carrier was the best choice for our family. Everyone loved it! Riley soon enjoyed riding around on our backs while we enjoyed the freedom of carrying our baby on our back! I still used the ring sling & pouch quite often, but preferred the Ergo for longer time periods due to it's comfort. Later, I decided to save up enough money and bought a used woven wrap. I was in love! However, Riley was nearly 2 and very independent - he wanted nothing to do with riding around on mama's back anymore. Now Riley is 3 and still asks to be carried on my back from time to time so I keep the Ergo in the car, just in case.
Riley, 2 months, in a Moby front carry with Mama & Daddy.
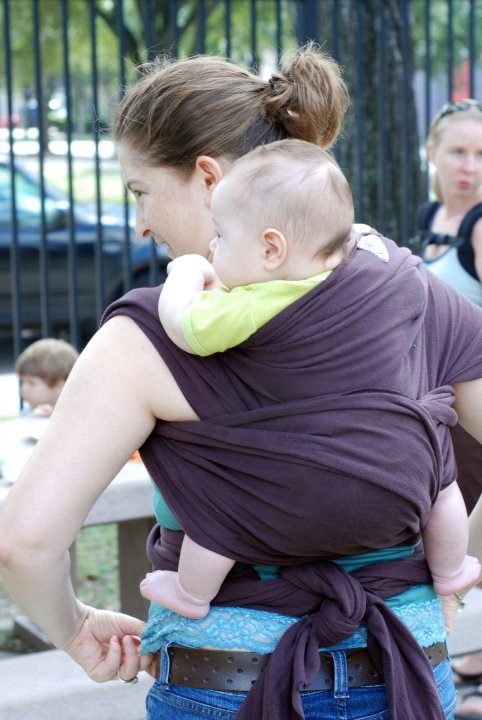
Riley, 3 months, trying out a back carry (I think rucksack carry) in the Moby wrap.
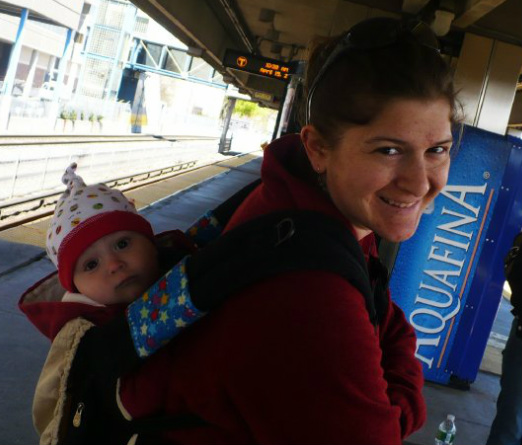
Riley, 10 months, in the Ergo in a back carry.
Bringing Information and Resources to Houston is an amazing event held each year to educate pregnant women and families in a free, fun, and exciting way! As you arrive, you receive a free goodie bag with pamphlets, coupons, and freebies. Next, you must decide which of the speaker sessions you'd like to attend. There are multiple rooms where a variety of informational lectures/talks/demonstrations/films take place. You can learn about nutrition, education, babywearing, breastfeeding, health concerns, and so much more! Then there are the vendors!! So many wonderful vendors come from all over Houston and the surrounding areas to offer their services. Some vendors have supplies you can buy right at their booths, others offer discounts for when you visit their store later. Many vendors have freebies, giveaways and raffles, and baby stuff for you to try out. I'll be honest - the vendors are personally my favorite part of the B.I.R.T.H. fair ;-) At Noon, we celebrate the physicians in the community who help support healthier mother & baby maternity care. Following the awards, there is a fashion show! The models are families from the community wearing clothing from various local stores as well as cloth diaper apparel and sometimes babywearing gear. The children have such a great time being a part of the fashion show! You can tell they know they're doing something very important! Oh, and did I mention that all of the B.I.R.T.H. Fair events are FREE!?! Yup! 100% FREE!! So if you are pregnant, new mama, old mama, small family, large family, or even just thinking about having a family, this fair is for YOU! Come out and meet the members in your birthing community! It is a wonderful time to find the support you need for your pregnancy, babies, and children of all ages! Also, don't forget to stop by and see me at the Music Garden booth - I'll be helping out there this year!
Click here for a detailed list of the Special Speaker Sessions: diapers, dads, & doulas, vaccines & VBACs, waterbirth, healthcare options, postpartum disorders, & education...there is something for everyone! Babywearing "Got a babywearing breakdown? Come by the BIRTH Fair's Sling Station, open 1 p.m. to 4 p.m., Saturday, October 6, 2012. Local babywearing "technicians" will provide free, one-on-one baby carrier advice and tune-ups. Improve the fit of your existing carrier, learn a new technique or carry, get a recommendation, or ask a question!
New to babywearing? Please join Angelique Geehan and Mary Puryear Potee at 11 a.m. for "Baby Carriers and Slings 101." This orientation will cover the benefits of using cloth slings, major types of carriers, how to select a good carrier for your family (including basic safety points), and where to find help as your family's babywearing needs change.
Please feel free to spread the word!" - from my friend's Facebook page :-)
Extras! - This is a 3 day event! Special Speakers Series
Friday, October 5, 2012United Way - 50 Waugh Dr. - Houston9:00 am to 12:00 pm - CPR - FREE - register at [email protected] 9:00 am to 9:45 am - Circumcision
9:45 am to 10:30 am - Placenta Encapsulation
10:30 am to 11:15 am - Abdominal Scar healing
11:15 am to 12:00 pm - AcupunctureSunday, October 7, 2012
Haven Center St. Stephen's Episcopal Church - 1827 W. Alabama1:00 pm to 3:00 pm - Birth Trauma & Your Baby's Brain - Pauline Dillard 3:00 pm to 5:00 pm - The Birth of a Father - Patrick Houser
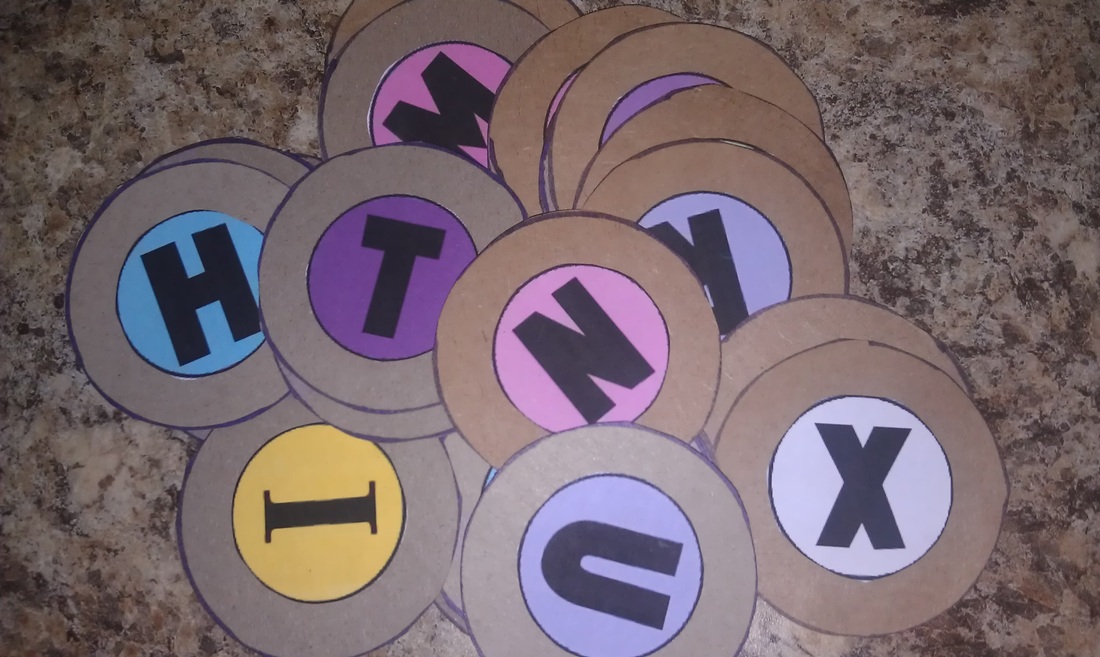
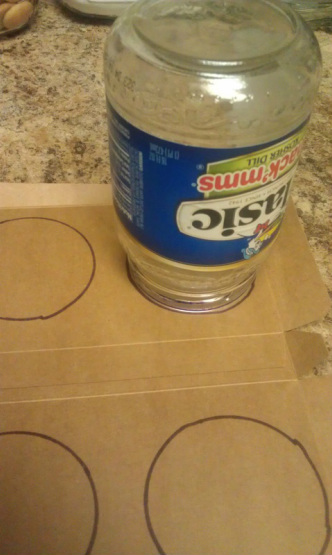
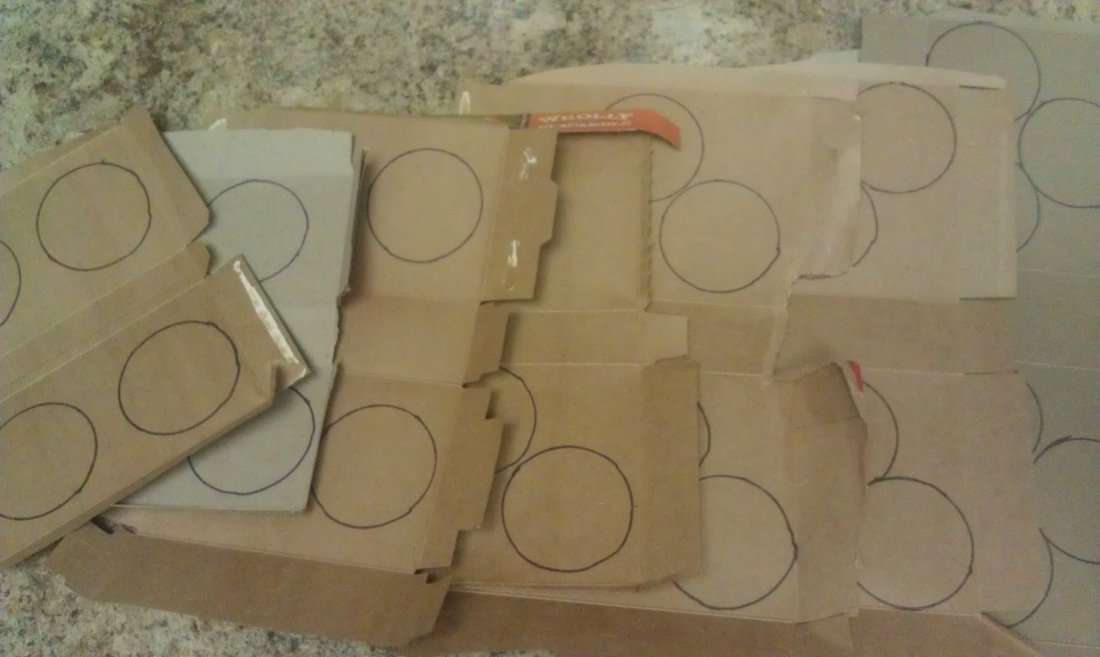
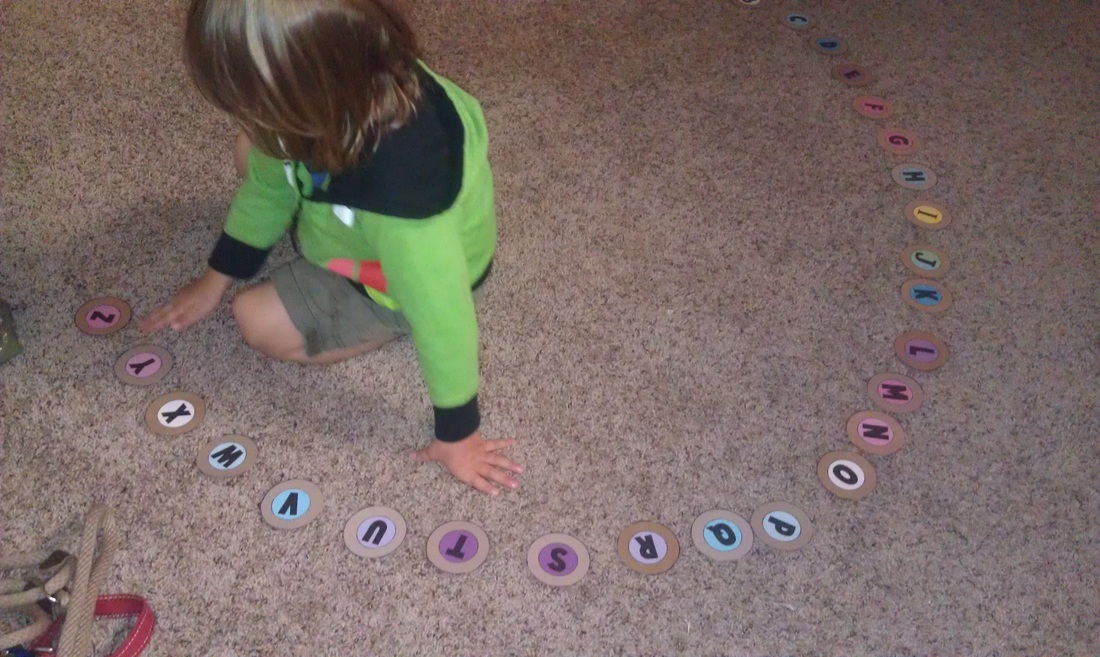
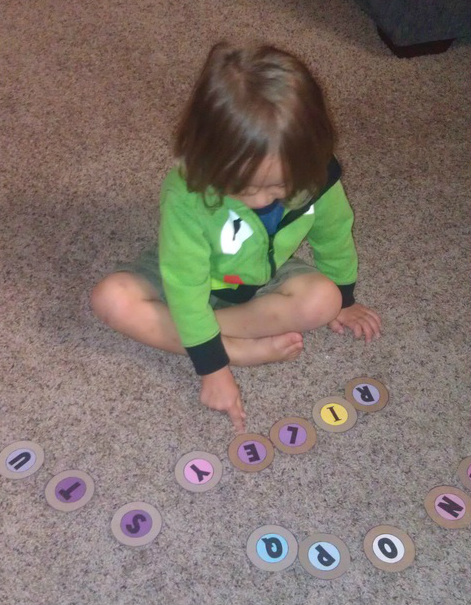
Riley has a huge interest in the alphabet right now so we have been reading lots of books, singing the alphabet song, spelling words we see while we drive, and creating letters out of various materials. While browsing Pinterest, I found some inspiration here & here to create a set of alphabet circles for Riley to play with. First, I traced circles with a jar onto recycled cardboard boxes. Then I had to cut them all out!! A few sore fingers later...I had a nice stack of discs, which Riley was already enjoying stacking up and turning them over. Then I went online and found a printable alphabet and numbers to paste onto the circles with a glue stick. Notice that most of my colors are shades of pink & blue...after the "I", the yellow ink ran out! Oops! We immediately set about sorting our new alphabet on the floor and sang the song to help us get everything in the right order. And of course, we had to spell Riley's name! Not only was it fun to find the letters in his name, we also had fun returning the letters to their rightful spot in the lineup, singing the song once again to make sure the "E" and "I" weren't mixed up.
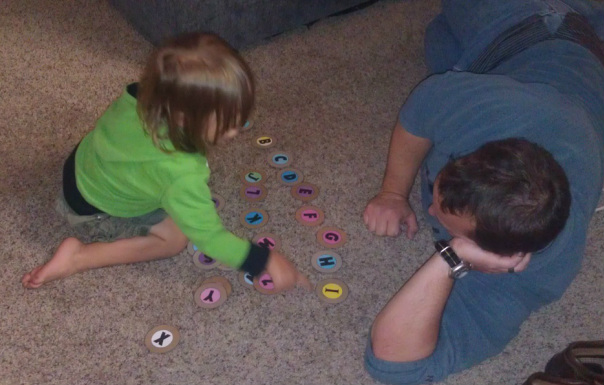
Riley wanted to show Daddy how to line up the letters properly.
Hippo! No, Rhino by Jeff Newman
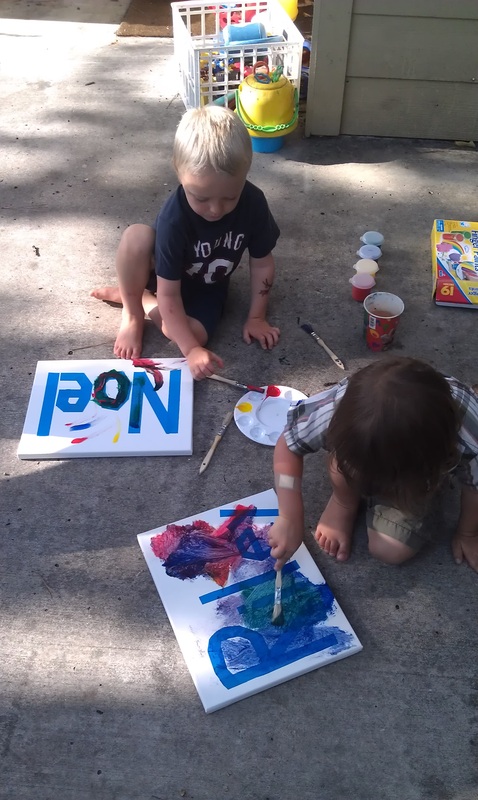
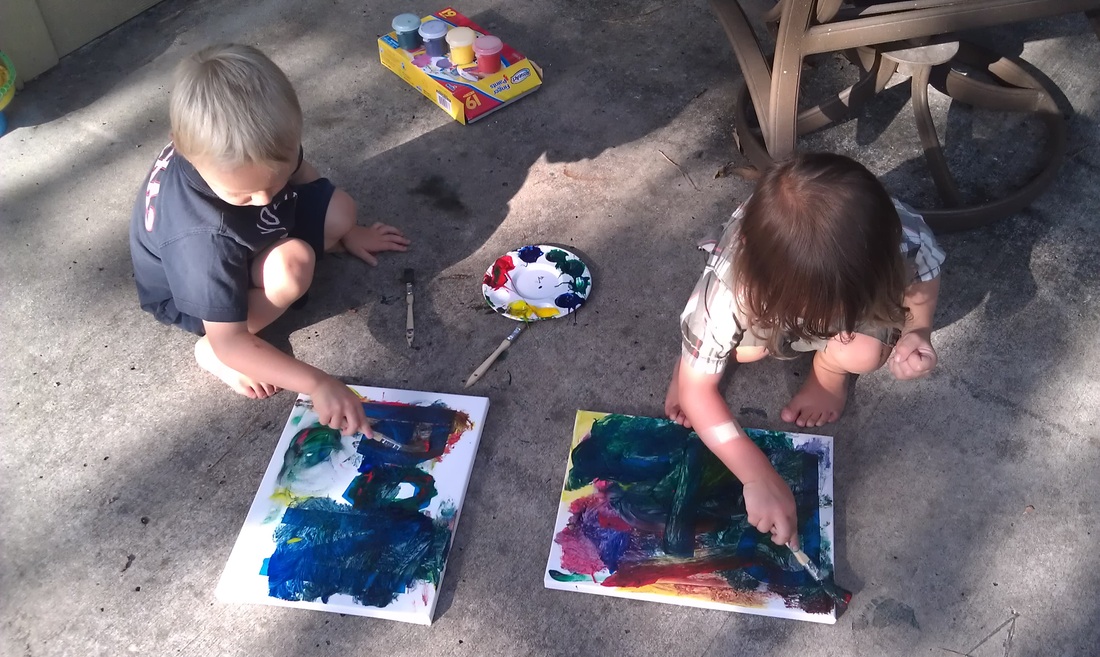
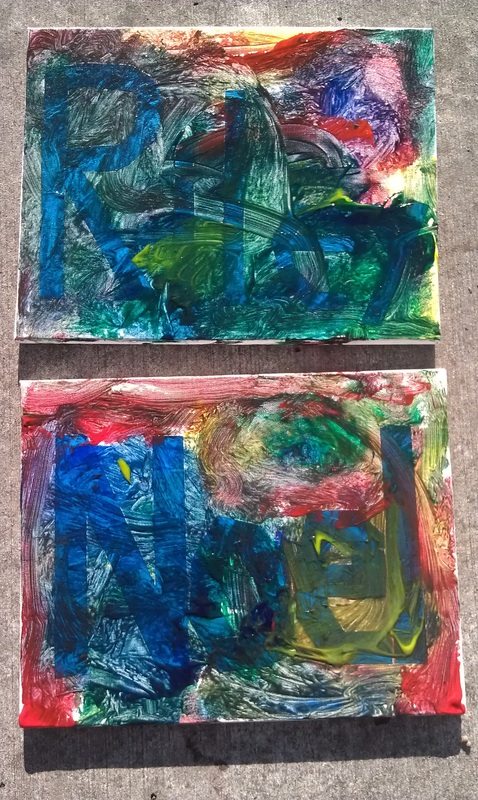
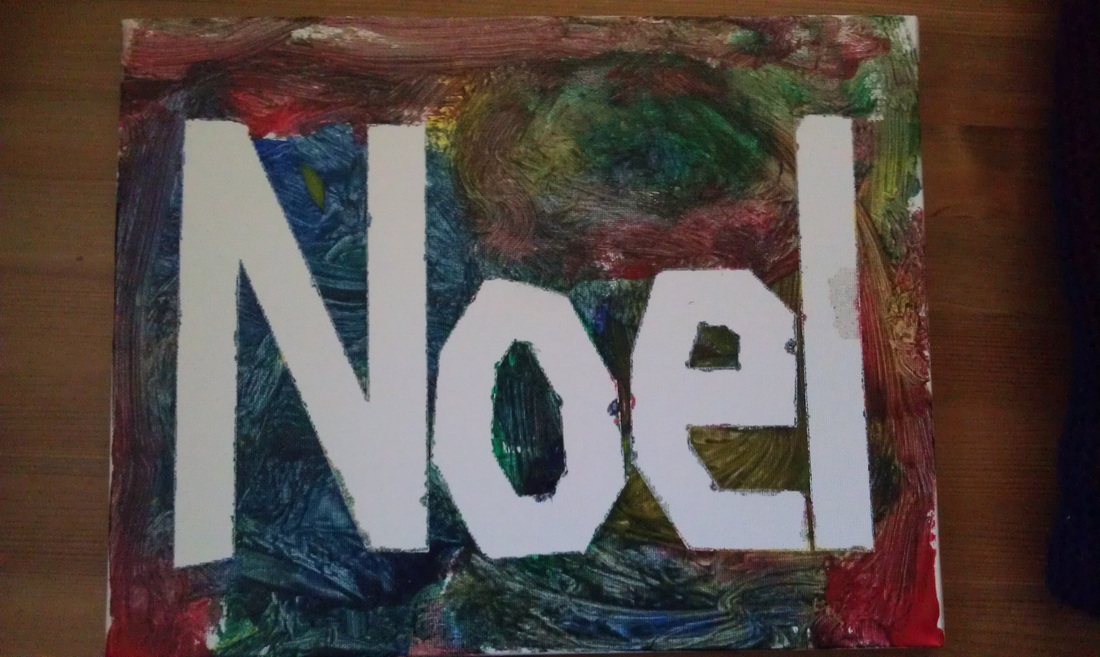
After I saw this pin on Pinterest, I knew I had to do this craft with Riley! Lucky for me, Hobby Lobby is always having great sales and the canvases were on sale in a pack of two...one for Riley and one for his friend, Noel. After you remove the tape, I recommend coating the painting with a clear spray to help protect your lovely artwork. We used washable finger paints so a clear sealant was a really good idea to make the artwork last. Now we have some great artwork to hang in the boys' rooms!
|