This week is teacher appreciation week and I wanted to make something fun for Riley's teachers. I was searching my Gift Ideas board on Pinterest when I found this pin: 39 DIY Girfts You'd Actually Want to Receive. I had pinned the photo of the Terrarium Kit and knew that this was what I wanted to do! Of course, I had the so much fun buying supplies and getting everything ready that I finished the terrariums instead of leaving them as a kit for the teachers to put together...something tells me they won't mind too much!
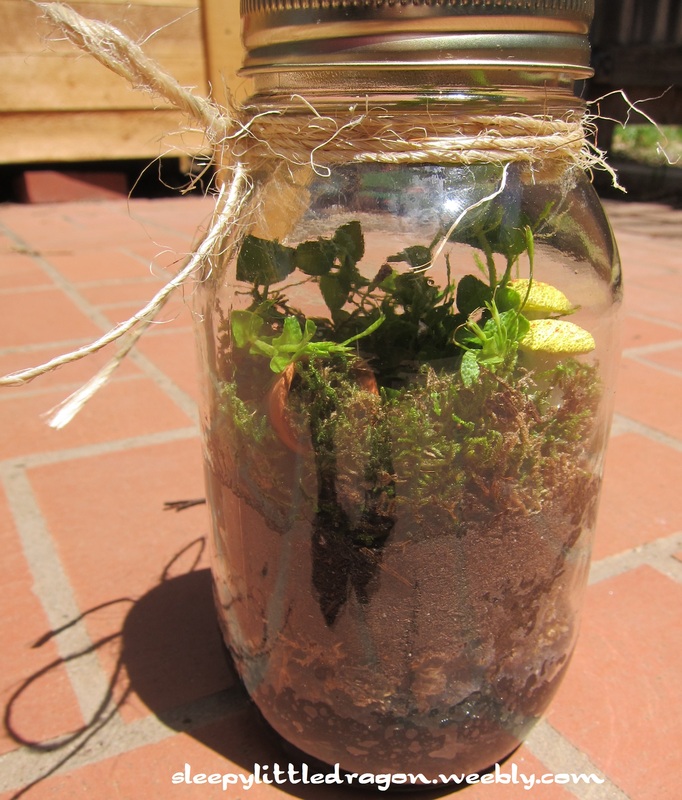
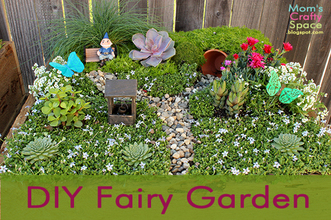
Teacher gift - DIY Terrarium
While I was making the teachers a terrarium, I decided that I needed one as well...then my husband asked for one for his office so in the end, Riley & I made 4 terrariums!
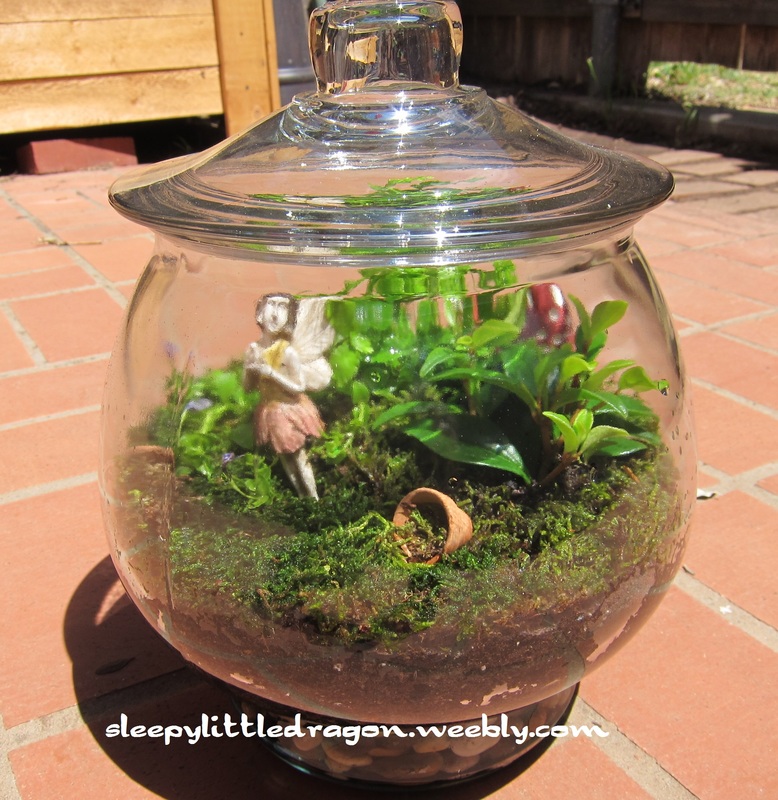
My terrarium, complete with spilled terra cotta pots, mushrooms, & a faerie.
I pulled some Pinspiration from my Plants & Fungi board to see more instructions on what all to include in my terrarium. I ended up combining a few things, mostly because I really liked the layered look of one terrarium in particular (seen here). (Also, there are some great instructions found at this website.) Supplies! - Glass jar
- Gravel, pebbles, marbles
- Activated charcoal (available at pet stores or gardening stores)
- Sphagnum moss (the dead stuff, found at gardening stores)
- Potting soil
- Small plants
- Spoon & butter knife
- Moss (living would be best)
- Small decorations
Make it! - Pour in 1-2 inches of pebbles on the bottom of the jar.
- Place sphagnum moss - this helps prevent the soil from going down into the pebbles.
- Add a thin layer of activated charcoal - this helps to filter the air. *Note - I forgot and did the charcoal before the sphagnum moss...oops!
- Sprinkle a layer of potting soil, roughly ~1/4 - 1/2 inch.
- Remove your plants from their pots and break up the roots a bit to encourage growth. Place in the terrarium in the desired positions - take your time! This is part of the fun in deciding how to set it up.
- Using the knife to help you hold back the plants, spoon more potting soil all around the plants, filling in the gaps. You should have about 1-2" total potting soil.
- Add the moss - you'll need to break it into smaller chunks to fit the spaces around your plants. Gently lift the foliage and place the moss all around the plants' stems. I used the knife to sort of poke it down into place, pushing the edges of the moss down around the inside of the jar.
- Add decorations! My favorite step! I purchased most of my things from my local garden store - they now have fairy garden supplies, making it awfully convenient to pick up cute little decorations! I found the terra cotta pots at Michael's.
- Sprinkle in some water, not too much...it shouldn't be higher than the gravel in the base of the jar.
- Put the lid on and leave it in an area of your home that receives bright light (not too dark, not too sunny!).
It may take awhile to figure out if you have too much water or need to add more. Keep an eye on your terrarium and if it starts to look dry, add more water. If there is too much condensation, remove the lid for a little while to let the water escape. You should be able to reach an equilibrium where you need not remove the lid! You'll have your very own self-contained terrarium! Learn more!
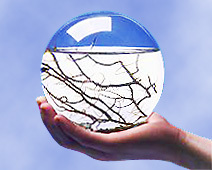
EcoSphere Self-Contained Underwater Ecosystem
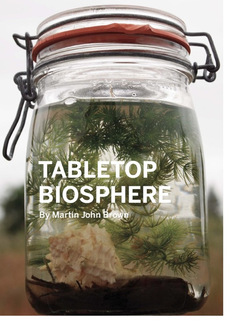
Make your own Biosphere!
- Here's a great list of terrarium books someone else has already put together.
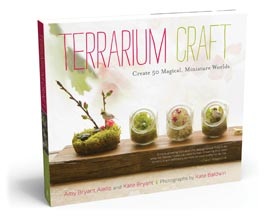
Terrarium Craft: Create 50 Magical, Miniature Worlds By Amy Bryant Aiello and Kate Bryant
- You should also check out the amazing Fairy Gardens on The Magic Onions! They have a competition every year so there are loads of fun photos to ooooh and ahhhhh over!
I had the wonderful opportunity to take a free composting class through the Texas AgriLife Extension Service, something I knew nothing about until I put my name on a list at a booth at the Midland County Fair so I could learn more about recycling in the area. The TAES has a program called Earth-Kind, which provides the public with the knowledge and skills to protect the environment while obtaining "maximum gardening and landscape enjoyment." We were first introduced to the composting class by a gentleman who spoke to us on behalf of the Texas Commission on Environmental Quality. He explained a lot about the municipal solid waste and landfill disposal in Texas. This two night program was available due funding from the Regional Solid Waste Grants Program. So not only are we learning how to compost, but this free program will help encourage the public to reduce their average pounds per person per day amount of garbage that goes into the landfill, thereby saving everybody money. Recycling is a fantastic way to do this! Our classes were taught by Permian Basin Master Gardeners, volunteers who have been educated on gardening and horticulture through many hours of hands-on training. These volunteers then in turn, share their knowledge with the public. The first night, our class met at the Commemorative Air Force Museum where a Master Gardener taught us what composting is and how we can build and maintain a compost pile. The second night of our class was located at the Time Machine Recycling Center in Odessa. Here we learned about vermiculture or how to raise worms to produce compost. We then went outside to help build a new compost pile in the Permian Basin Master Gardener's demonstration garden. The most important thing I learned about composting?? If there's ever something wrong with your pile, turn it! Turning it helps in the decomposition process and can solve many problems that you may come across. The second most important thing I learned about composting?? The BROWN:GREEN ratio should be around 30:1. Browns are materials high in carbon such as shredded paper, dried leaves, or dried grass. Greens are materials high in nitrogen such as your kitchen scraps (no meat or dairy), fresh grass, coffee grounds, or herbivore manure. Too many browns will lead to slow decomposition process and too many greens will lead to a stinky pile. I also learned that you shouldn't waste your money on the plastic barrels for composting as they take a very, very long time to compost and the plastic will probably break down too quickly for your liking...especially in West Texas heat. The simple 3'x3'x3' wire mesh is the most sturdy as well as the easiest to manipulate when you need to get at your pile. You can see an example here - though I must note that the Master Gardeners mentioned the aerating wire stand in the middle would be more helpful to grow your tomatoes and not in the compost pile! The most wonderful part about taking this composting class was that we each went home with our very own FREE 3'x3'x3' wire compost bin, "tomato" stand, thermometer, & red worms! I didn't know about that when I signed up for the class but am sooo glad I decided to go!!
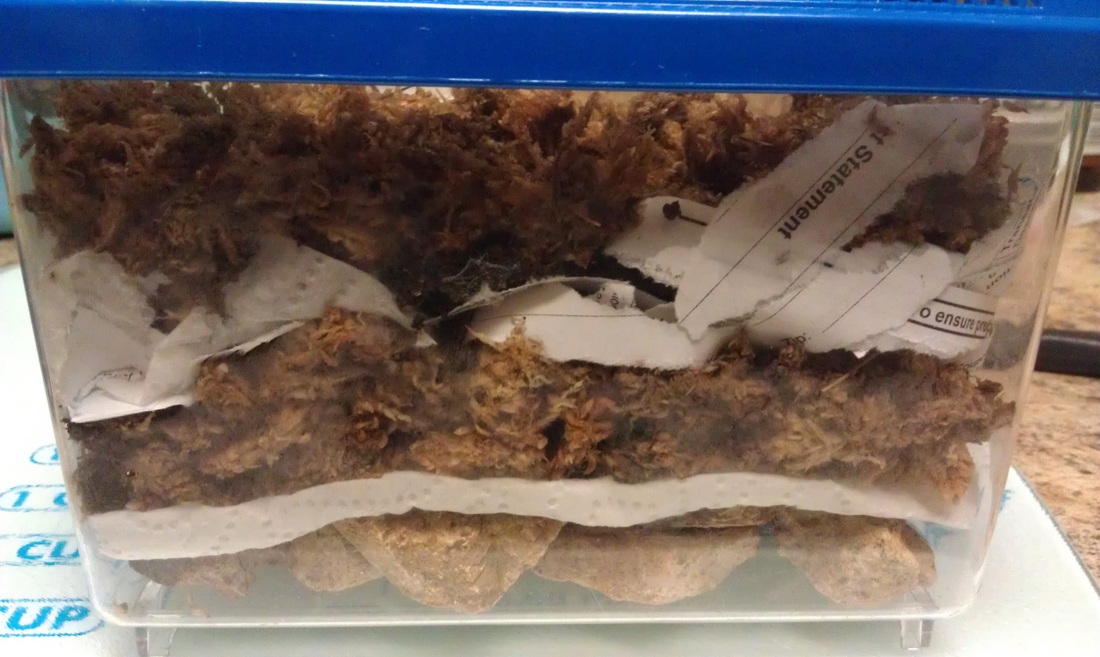
Super mini-vermiculture!
As we are in temporary living, so our the worms! The smallest recommended container for vermiculture is a 10 gallon bucket. What size did the Texas Master Gardener use at her home, you may be wondering?? An old refrigerator laid down flat on its back! The layers in my mini-vermiculture are sphangum moss & lettuce, worms, shredded paper, sphangum moss, paper towel, & rocks. There needs to be a layer of rocks or other bulky material at the bottom to collect the water that drips down from the composting materials above. This liquid is called "tea" and is a fantastic, organic fertilizer for your plants.
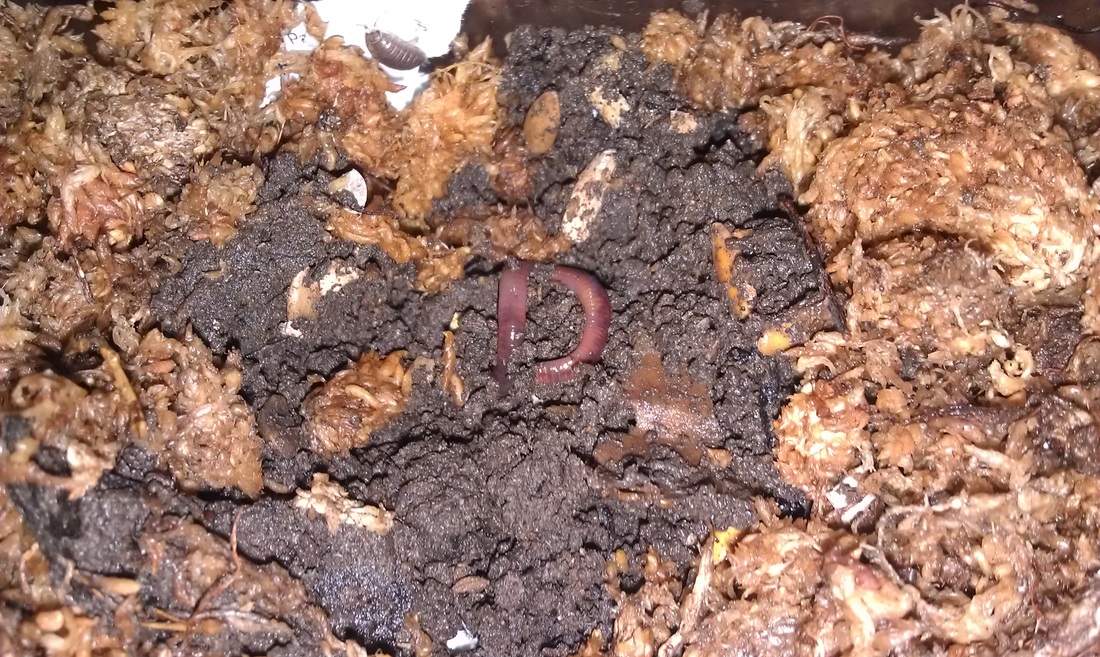
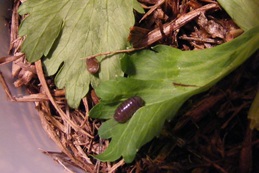
Little red worm trying to hide from the light, as well as a pillbug scurrying about in the back.
Eventually, the worms will mix up the materials above the paper towel into a dark, rich, earthy-smelling compost that can be used in your gardening. You can see a little bit of that material around the red worm in the photo above. My goal right now is to keep the worms alive long enough until I can find a larger container to transfer them into so I will have to be careful that they don't get overfed (or it will stink) or under/overwatered (or they will die). At that point, I will make them a proper home following the recommended guidelines from our class. Do you have a compost pile? Do you have composting worms? Tell me all about it as I am new to composting and would love to hear your stories! Learn more! A few PDFs and websites from my class:Soils & CompostingBackyard Conservation - CompostingEarth-Kind - CompostingWorm CompostingVermicultureHappy D Ranch - worm composting
Of course, we have to share the photos of the many little invertebrates that we have seen in our garden this spring. Unlike last year, when the garden was new, this year we are seeing many different species of caterpillars! I don't know all of them, but we have seen Black Swallowtail, Monarch, Gulf Coast Frittilary, & a Tersa Sphinx Moth. We have also seen a few others in our yard and at the Houston Arboretum & Nature Center, I had the great pleasure of seeing a Spicebush Caterpillar - one of my favorites! While camping at Brazos Bend State Park, we saw fireflies & dung beetles. We have also seen great big black fuzzy caterpillars, inchworms that look like twigs, and caterpillars that have horns and eyes! So many different bugs! What kinds of critters have you seen? Have you kept any caterpillars indoors so that you can watch them form their chrysalis and best of all...watch them emerge as a butterfly?? Happy bug watching!!
This spring has brought us many beautiful flowers in our butterfly garden and back yard. I have been taking photos of these flowers for a few months now and have decided to compile them into a slideshow to share with you. There are even some flowers that may otherwise be considered the oh-so-scandalous weeds! However, a plant is only a weed if it is growing somewhere where it is not welcome....all flowers are welcome in our yard!
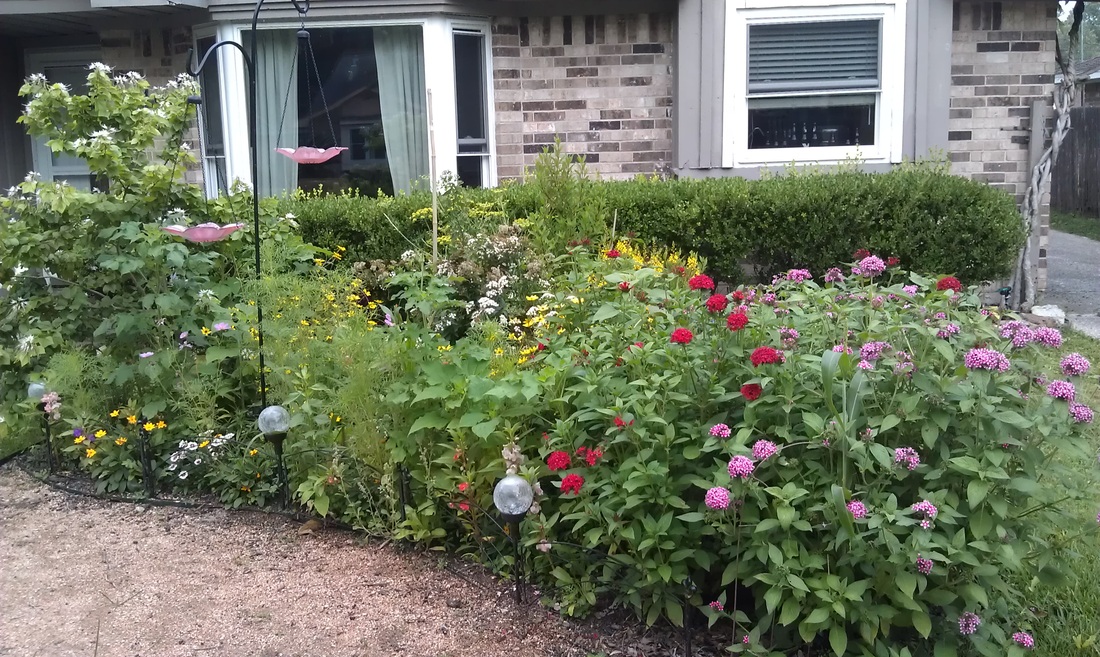
Our butterfly garden was planted last April and has grown and flourished. We have really enjoyed seeing the many different critters that come to enjoy the garden. (Post on critters coming soon!) This spring, as the plants started to take off growing again, I transplanted the purple porter weed and some of the fennel to my back yard where they would have more room to grow and could take up as much space as needed. To fill in a few gaps, Riley & I sprinkled a butterfly seed mix which has quickly filled up our little garden and surprised us with a huge variety of flowers to enjoy.
If I had to pick favorites, I would say the Jasmine & Gardenia have the most lovely aroma, but the Passionflower and Hibiscus are probably my most favorite to look upon. What do you have growing in your yard? What are your family's favorite flowers?
This is going to be a good year for Sleepy Little Dragon...why?? This is the Year of the Dragon!! The year of the Water Dragon to be precise, two of my favorite things!The Chinese New Year Day is on January 23rd and the year of the Black Water Dragon begins on February 4th, 2012. Check out this page to learn more about the Chinese horoscope for this upcoming year. Find out more about how to celebrate the Chinese New Year here.Also, be sure to check out Appreciate a Dragon Day on January 16th!! Check out some dragon books from your favorite library and read all about them. Then you can do dragon-themed craft (see ideas below).
In honor of our namesake, here is a compilation of all things dragon.Quotes: Draco Dormiens Nunquam Titillandus 'Never tickle a sleeping dragon'. ~ Hogwarts' school motto, of the Harry Potter series Do not meddle in the affairs of dragons, for you are crunchy and taste good with ketchup. ~ Dilbert by Scott Adams If you don't believe in dragons,
It is curiously true
That the dragons you disparage
Choose to not believe in you.
~ Jack Prelutsky
No doubt but there is none other beeste comparable to the mightie dragon in awesome power and majestie, and few so worthie of the diligent studies of wise men.
~ Gildas Magus, Ars Draconis, 1465
If you ignore the dragon, it will eat you. If you try to confront the dragon it will overpower you. If you ride the dragon, you will take advantage of its might and power.
~ A Chinese Proverb

How to Train Your Dragon - Toothless & Hiccup
Movies
How to Train your Dragon - Toothless
Pete's Dragon - Elliot
Mulan - Mushu
Dragonheart - Draco
Harry Potter series
The Neverending Story - Falcor
Shrek - Dragon
Sleeping Beauty - Maleficent
Voyage of the Dawn Treader - Eustace
Books
Jeremy Thatcher, Dragon Hatcher by Bruce Coville
The Sword of Truth series by Terry Goodkind
A Song of Fire & Ice by George R.R. Martin
The Lord of the Rings series by J.R.R. Tolkein
Eragon by Christopher Paolini
Puff, the Magic Dragon by Peter Yarrow & Lenny Lipton
DragonSpell by Donita K. Paul
Dragon's Milk by Susan Fletcher
Who wants a Dragon? by James Mayhew
Saint George & and the Dragon by Margaret Hodges
Jane and the Dragon by Martin Baynton

Flying Dragon

Trogdor!
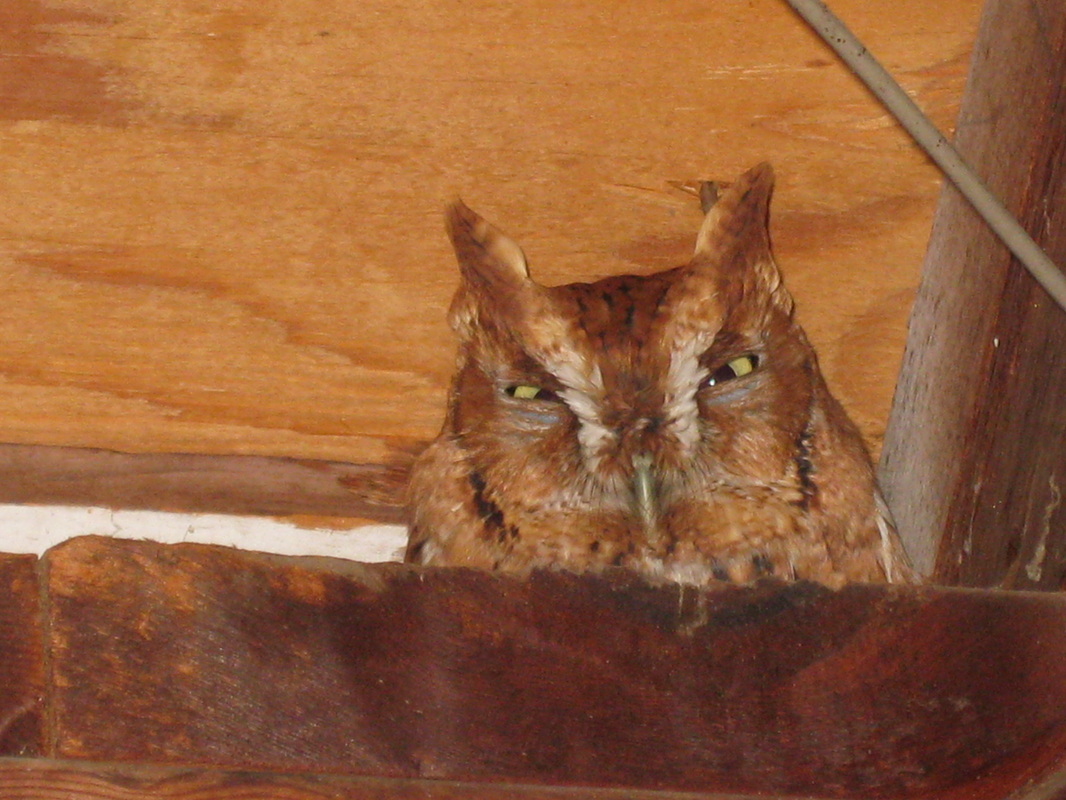
Hello, cute little Eastern Screech Owl! This adorable little guy was resting in our neighbor's garage yesterday. We decided he must have needed a nice place to stay out of the cold as Houston finally had freezing weather the last two nights. Learn More!
 April 2011 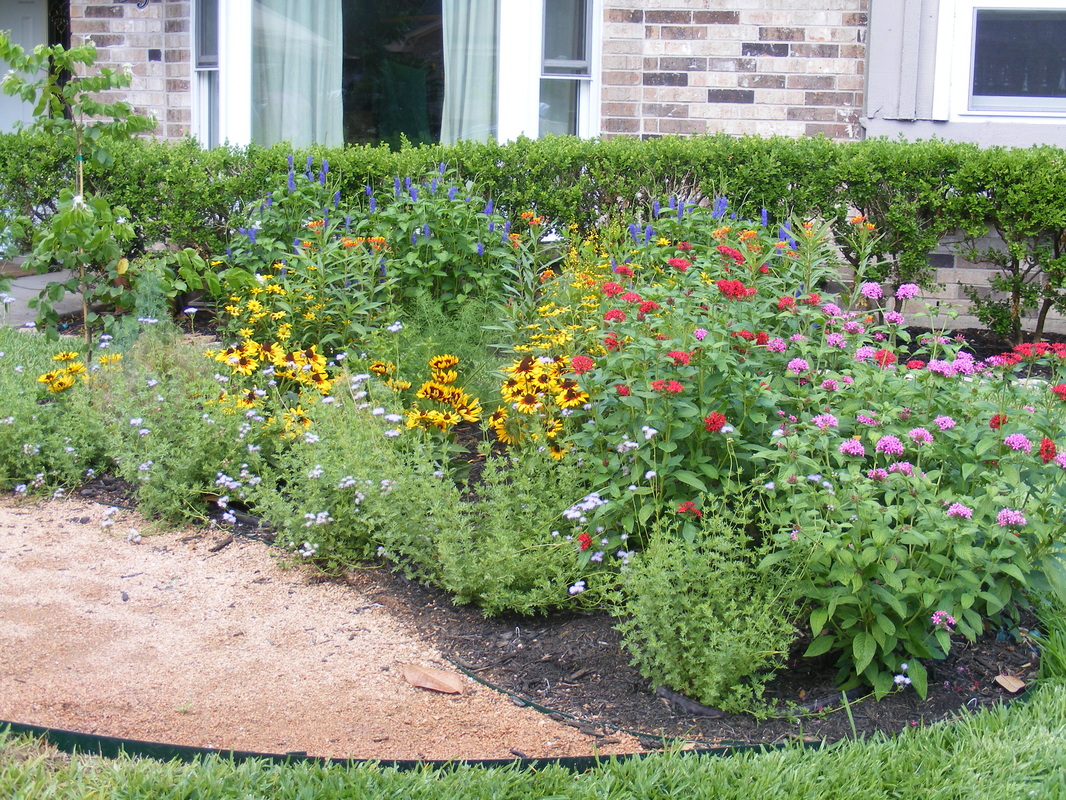 June 2011 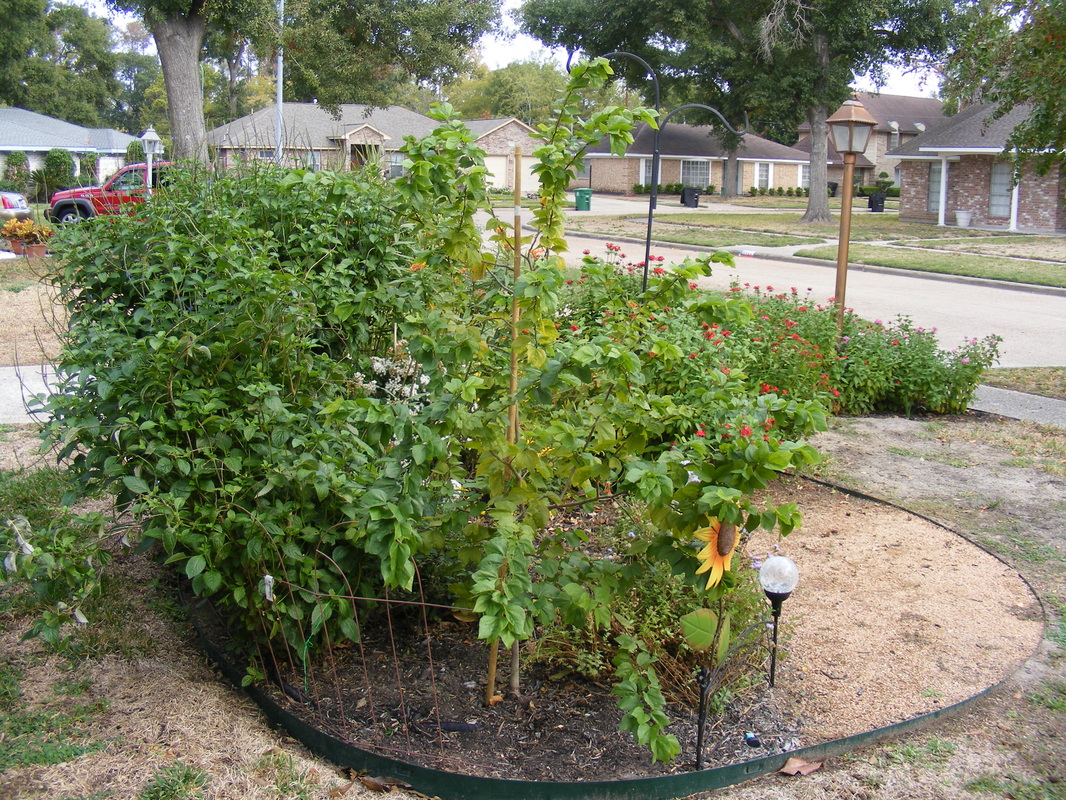 November 2011 Last April, we hired Organoscapes to create a butterfly garden for our family. It has been such a joy to watch it grow, bloom, and attract wildlife! As you can see by the photos above, it has flourished and grown as wild as I had hoped! A few plants died off and I trimmed back others, but for the most part it has been doing wonderfully! We have enjoyed going out and looking for butterflies, observing a variety of bees, & hoping to find caterpillars. Along with learning about the pollinators, we have also been learning about how ladybugs like to eat aphids. It has also provided a nice place to teach Riley about gardening since that isn't a regular hobby of mine. A Few Tips for a Successful Butterfly GardenIn order to have a more successful butterfly garden, it is important to offer plants that provide food for the adults (nectar plants) as well as food for the caterpillars (host plants). A great way to learn about what plants will work best for you is to check with your local arboretum or check out field guide books from your library. Here is a great website I found that provides free Pollinator Friendly Planting Guides. You enter in your zipcode and it will provide you with a ton of info for your region including who is native to your area, the plants they like, when those plants bloom, and how much sun they will need. Butterflies, males in particular, will also need a source for supplemental salt & minerals. They usually get these nutrients from mud puddles, which can lead to a behavior called " puddling". You can provide your own puddle by setting out a terra cotta saucer and filling it with sand/gravel. Pour in a bit of water to moisten the sand and add a few flat rocks or shells to provide the butterflies a place to bask in the sun. You can also sprinkle a small pinch of salt to help attract the males. There are some butterflies that are attracted to overripe fruit - which is a super cheap way to bring them to your garden! Save your old bananas, strawberries, oranges, etc and set out on a tray in your garden. You can also make your own nectar, much like you would for hummingbirds. Get more details on feeding butterflies here. We have only seen two different caterpillars in the garden so far - a Monarch on the Milkweed and a Wavy-Lined Emerald on the Denver Daisy. The Wavy-Lined Emerald (which I cannot find my photo!) is a really neat moth caterpillar that camoflauges itself by taking bits of flower petals and gluing them to its back for disguise. I noticed this particular caterpillar because I saw a purple flower moving on the yellow & brown Denver Daisy! He chose the wrong colors to hide on his current food choice! 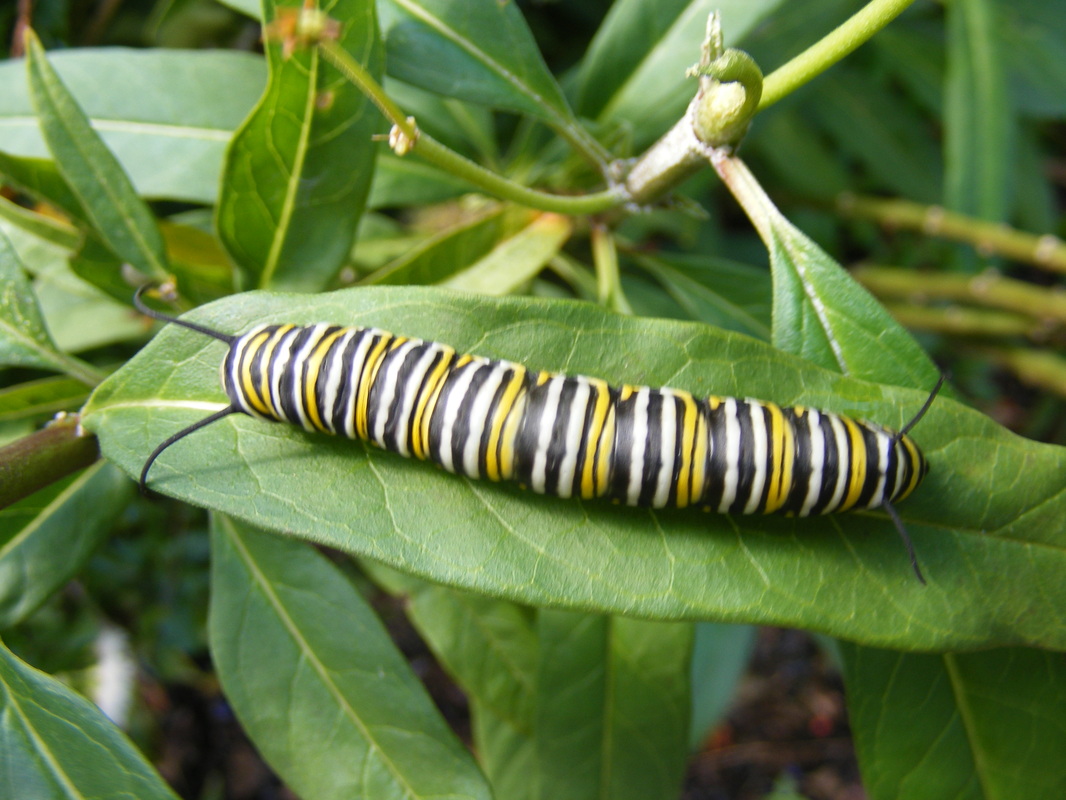 Monarch Caterpillar If you have a butterfly garden, be sure to leave a link in the comments - I would love to see yours! Happy Gardening! Our butterfly garden plants:- Mexican Orchid Tree (nectar)
- Golden Shower Thryallis (nectar)
- White Mistflower (nectar)
- Blue Mistflower (nectar)
- Blue Porterweed (nectar)
- Mexican Butterfly weed aka Milkweed (nectar & host)
- Pentas - Starburst/Ruby Glow (nectar)
- Denver Daisy (nectar & host)
- Sunflower (nectar)
- Dill (host)
- Fennel (host)
- Passionflower (nectar & host) - in our back yard, not the butterfly garden
- Turk's Cap (nectar) - waiting to be planted near the garden in the front yard
A couple notes: All of the Denver Daisy died off early on, but the Purple Porterweed & Pentas flourished! I had to cut back the Porterweed to make space for the other flowers and the Orchid Tree. I also took out a lot of the Blue Mistflower as it was not looking very good. I plan to relocate some of the Porterweed and plant a few coneflowers and perhaps some other, smaller flowers to fill in the gaps. A few of our wildlife visitors:Helpful links:
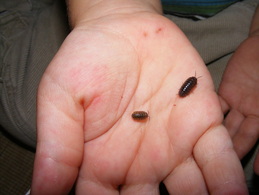
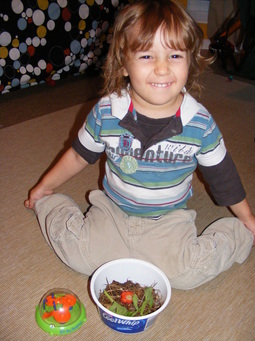
Riley received a cute little Roly-Poly Playground for his 2nd birthday over the summer. Unfortunately, the drought had caused all the pill bugs to go into hiding and we were unable to find any occupants for his new toy. After discovering a pill bug at the Arboretum earlier this week, Riley really wanted to find some at our house. I decided that since we have been enjoying more rain recently, that perhaps they may start showing up again. We searched in the usual hiding places - the cracks between the sidewalk and the yard were the dead grass makes a tasty snack for pill bugs. No luck. We searched in the butterfly garden and underneath a few logs. No luck. Much to Riley's delight, we were finally able to locate a few small pill bugs hiding under a rock in a shady corner of the backyard. Hurray! We carefully placed them in their new playground, complete with slides and climbing structures, and Riley enjoyed watching them crawl around for quite awhile. I decided we should keep them around for a few days and asked Riley if we should build them a home for them to live in. He became very excited! He started doing a bit of shrieking and dancing and was very happy to help me carry the container outside to collect some dirt and leaf litter.
We set them up in a recycled plastic container with a layer of dirt, dead grass/leaves, a tiny sprinkling of fish flakes, and a small bit of greenery and fruit from the fridge. I'm not sure how long I will be able to keep them alive in captivity so we will most likely send them back to their home outdoors after a week or so. In the meantime, we will have fun enjoying their company in our home as our guests.
Roly-poly, pill bug, sow bug, potato bug, woodlouse...what are these little creatures? There are many common names for the pill bug and its cousins. They are all a type of woodlouse - the only crustacean that can live exclusively on land. Crustaceans?? That's right! The pill bug is related to crabs, shrimp, and lobsters. (Click here to see a GIANT deep sea woodlouse!) Among woodlice, you are more likely to be familiar with sow bugs and pill bugs. The main difference between the two is that a pill bug rolls up and sow bugs do not. Although they live exclusively on land, they still require a habitat high in moisture. They have gills, like all other crustaceans, and require a moist environment to breathe. This is why we weren't able to find any around our home this summer - no rain, no pill bugs. Pill bugs are not normally considered pests as they primarily eat decaying matter, but occasionally they will eat young plants. They are primarily nocturnal, can live from 1-2 years, and the mothers keep their eggs in a special pouch on their abdomen. If you choose to keep your pill bugs as a temporary pet, please do your research and remember to be careful with them - they may have a hard exoskeleton but are still easily crushed. Learn more about pill bugs:
Lately, Riley and I have been visiting the Houston Arboretum & Nature Center (HANC). Partly, this is due to the fact that the weather is now only reaching a high of around 90 and the humidity isn't in hyper drive. To me, summer has finally reached Houston!! Hurray!! We have been participating in a fun new program at HANC called "Tyke Hikes" that we have been enjoying. Each hike has a theme and they read a story to start out the program. Then we go on a guided hike to discover various things on the trails that go along with theme. Occasionally there is an art activity to go with it, such as a leaf rubbing. Even though Houston is suffering a severe drought, we have still been able to see many fascinating animals. I saw my first "in the wild" box turtle! So cool! We have also spotted armadillos, dragonflies, titmice, chickadees, hummingbirds, skinks, cardinals, beetles, carpenter ants, and have heard great-horned owls hooting back and forth. As the season begins to change, we look forward to seeing what new plants & animals we may see on our excursions to the arboretum.
|